
VSFX 420 Progress Blog
Project 1 : Compositing Light and Shadow
March 29, 2019
Reference Photo
This is the reference for my object besides the metal part in the middle but I couldn’t get that half out of the wheel.
Progress Render
I am still working on the texture for my wheel with making the edges meld more together. Also still working on the shaders.
Texture Map
Still editing.
March 31, 2019
Went to go take the background pictures for project.


April 1, 2019
Created the Beauty, Obj Occlusion, Ground Occlusion, and Shadow Render Layers.
I also cropped the chromeball image for the dome (fill light) in my scene.
April 4, 2019
Created more render layers for the sphere and created the shadow projection from the camera.
Image to project from camera from light.
Shadow Projection from Light (poorly edited)
The sphere with the projection on it.
The Shadow Reflection Render Layer.
April 5-6, 2019
Created the same render layers for my other object that rolls which is the skateboard wheel.


Then I really started making edits in Nuke with both the sphere and wheel.
Half of the nuke tree for the object in the scene
The other half for the ground.
April 7-9, 2019
The rest of the time was just used to test render and to keep editing small details as much as I could because I got sick over the weekend which made it hard. The images below are just some final stills from my project.
Reference
Render
Overall, there are a lot of thing I am going to edit with this project. The biggest thing is the Shadow Projection, I just want to make that better so that the shadows on my objects, especially the sphere, better. Second would just keep working on the integration part of the project. But with all my hold backs, I think this turned out decent.
Project 2 : Compositing Shaders
April 13, 2013
Today we went out to go take our reference photos and video for the project, it was pretty easy to find nice spots for the photos. It was also windy so the back ground was moving pretty nicely itself, the only problem was that it was partly cloudy so the shadows were changing constantly. On, Sunday was when I edited and cropped the chrome ball photo.


Rock Reference

April 15
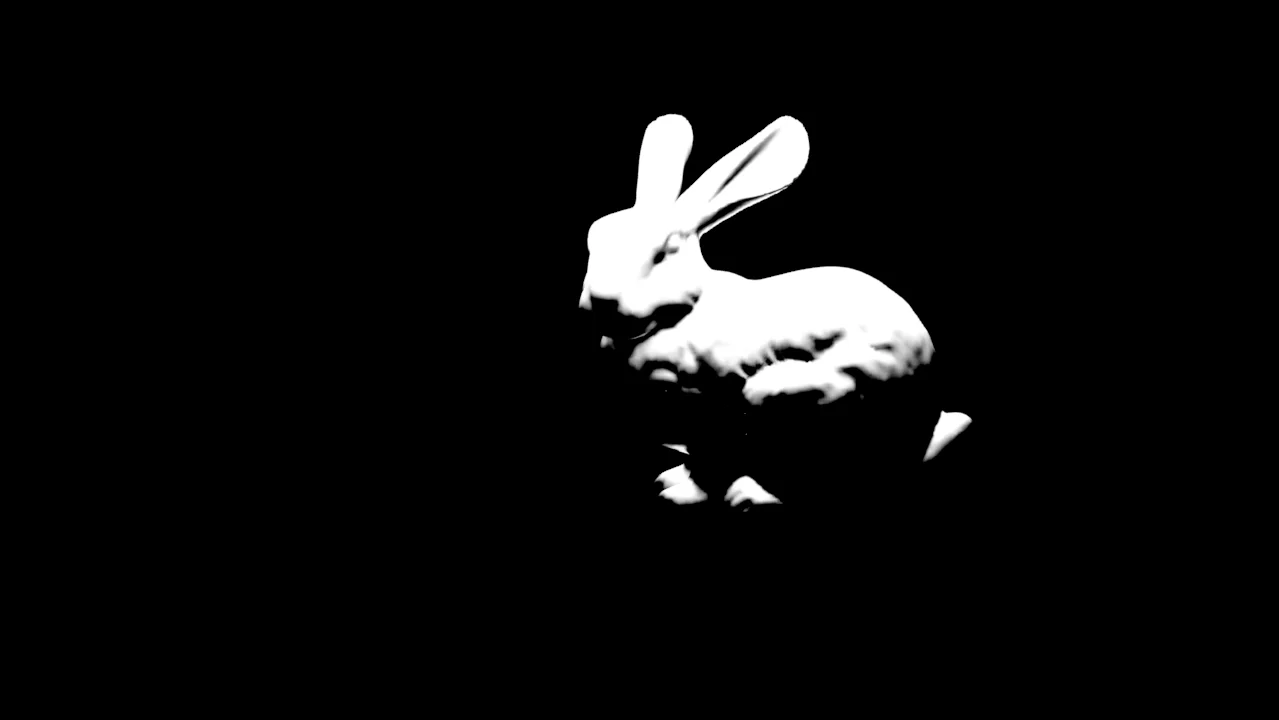
I started out today with matching my light, camera, and getting the references there to match like the cube and sphere. Match the perspective was kind of difficult and took some time, but matching the light was fairly easy because my box photo has a really nice shadow. Then I just added the sphere which kinda fit into the space a bit weird, but I think my sizing was just a bit off. I also imported the bunny Stanford Model and made it fit into the scene.
April 16
I was absent the day before so I was trying to play catch up today, and I tried to make my first attempts at the shaders the way I was told we did it in class.
I also started making the other render layers, below are renders of the first few I made.


April 18 - 19, 2019
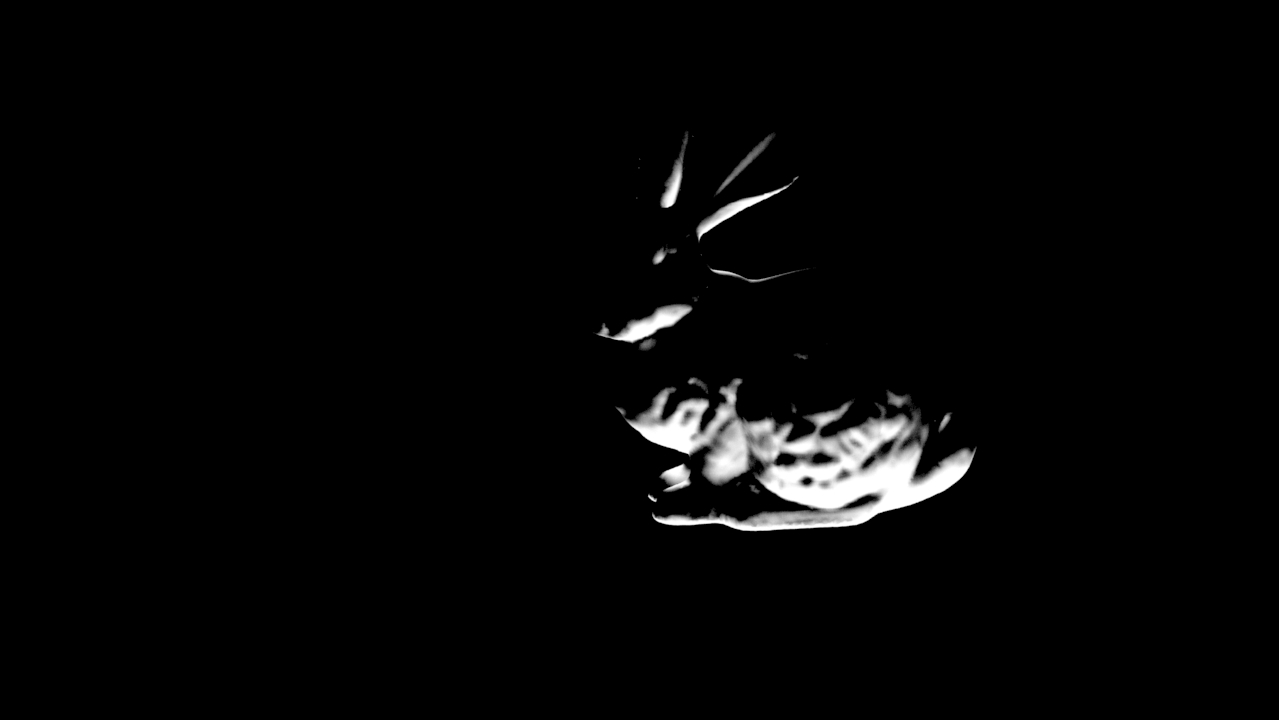
I used the majority of this weekend trying to get the shaders right on my rabbit to match my rock which I found very difficult because shaders have never been my strong suit. And my rock has so many different looks from all different angles.


This is my basic node tree in hypershade to make the shader.
I also started at some attempts at making render layers for the other textures on my rock like the lines and dots. I just put things in Nuke quickly to see how they looked.


April 23, 2019
Today I basically, was looking at the shader deeper because it is really hard to get it to match what the rock look likes. So the basic subsurface and transmission stayed the same, but I made a second subsurface and transmission for the half of the rock that is a lighter color that will use the subsurface mask I made. Then the second transmission is for the part of the rock that is yellow and is way more translucent.


I didn’t end up using a second shader for the second subsurface I just used the mask to color correct it in nuke.
April 26 - 28, 2019
This has been the last weekend to work on it and I have just worked on it everyday this weekend so there have been many small changes, but the shaders have pretty much stayed the same only with minor adjustments. I also Finally, made my Nuke file with out it just being a huge mess of nodes.
These are all the render layers I used in nuke.


Nuke Tree
While adding everything in Nuke I also added a camera shake node to my footage and added light wrap, edge blur, and motion blur for my bunny.
April 29, 2019
Here is a still frame of the final render.
Overall, this project was pretty challenging and I think I could have done better. Some of the main things I would like to add is the white around the edge of the yellow shader on the face, like how it is on the rock. I feel like the dots could be better and maybe I could use objects going through the bunny to make a better effect. The transition of the two different shades of the rock seems a bit weird. I just feel like it could have been integrated better, but I think it turned out pretty well and I think it matched the real rock and not really the reference picture of the rock.
Project 3 : “Magic Box”
May 2, 2019
I came up with several ideas for what the box and object should be inside it. My first idea was a TooFaced Highlighter box with walking animations from Mixamo. I ended up staying with that idea because it was the most thought out and well rounded idea.


May 5, 2019
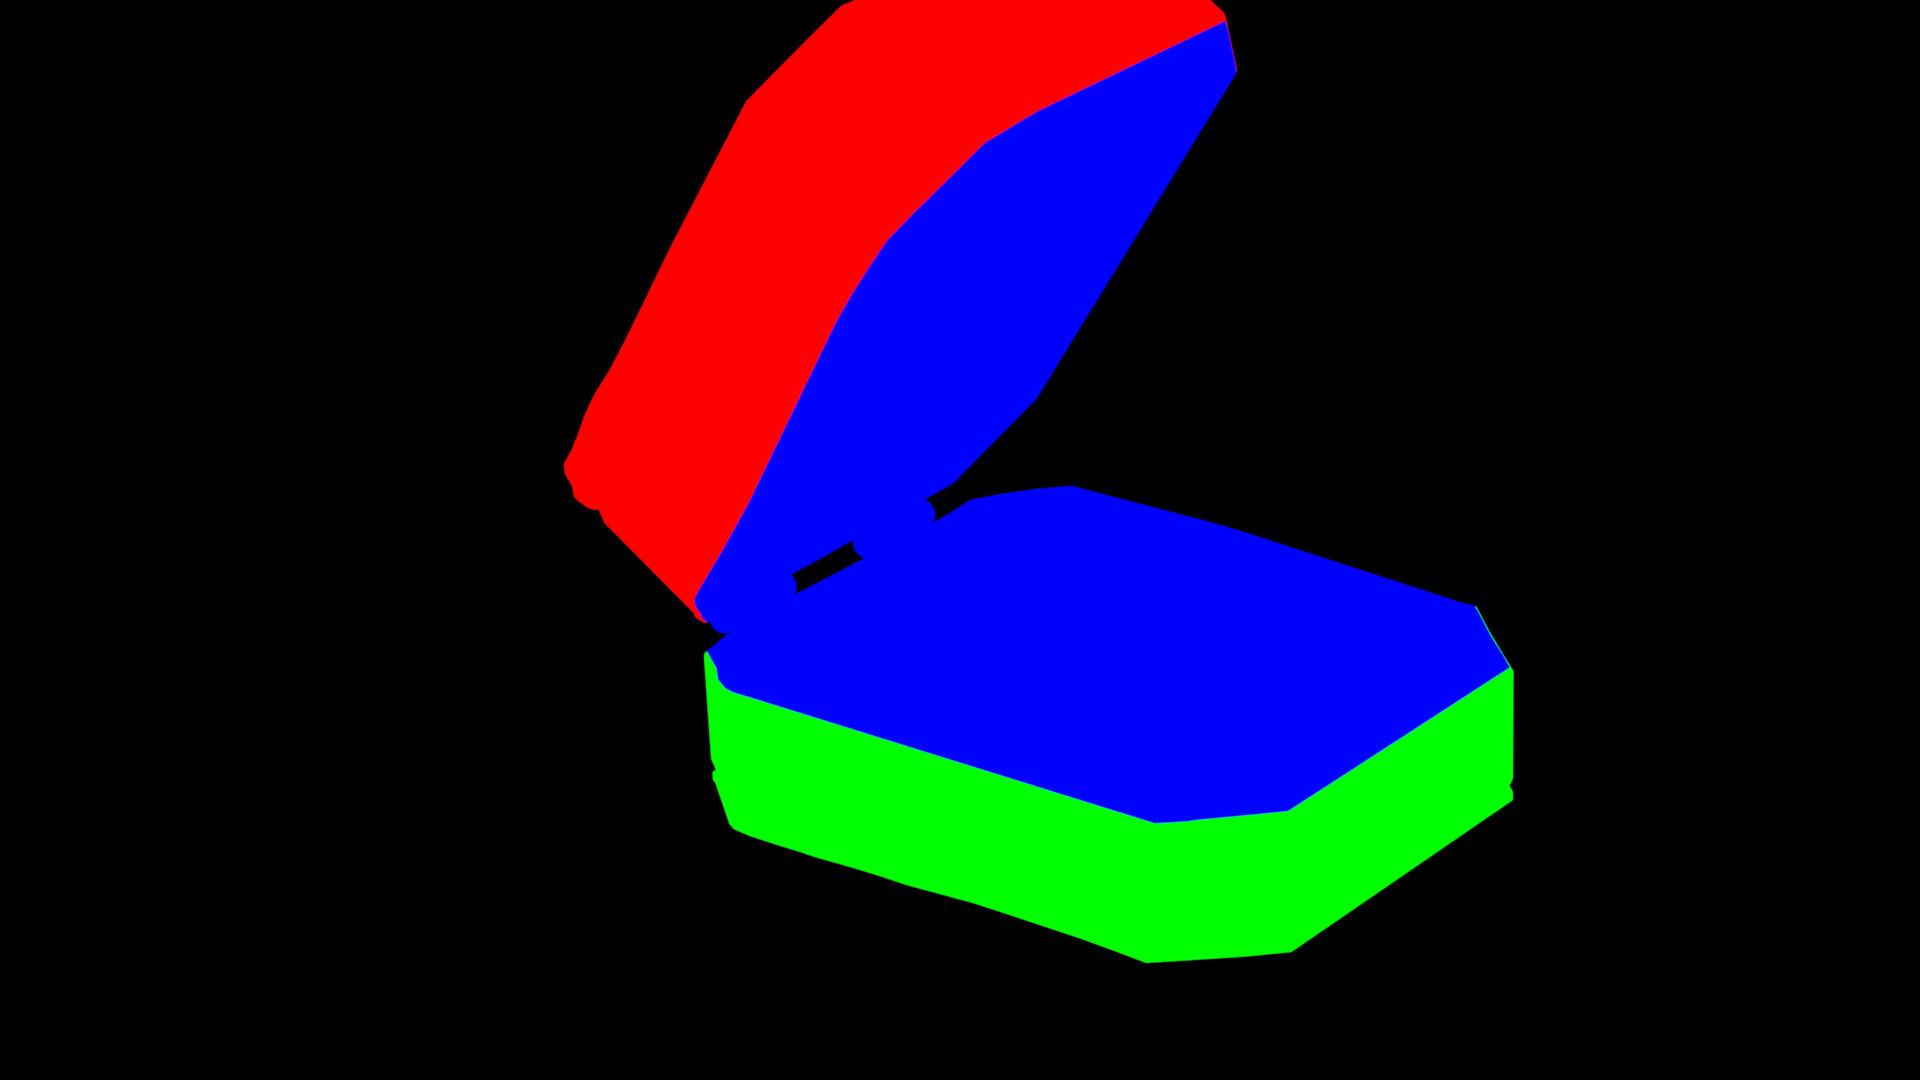
Over the weekend we took several backgrounds for our final project. We had to hurry because there was a chance for rain later that afternoon. My images were the first ones we took in the inside of my work (Ulta Beauty on the counter of the Brow Bar) since it made since with my theme. We took the grey ball, chrome sphere, and open box reference first, but I forgot to get a clean plate for the grey ball to comp one in so that was a hassle. Then I took several videos of my box on the counter. Like pans, tilts, and handhelds. My handhelds were terrible because my hand and arms were shaking too much. After looking at all of them I like the tilt one the best.


May 8, 2019- May 11,2019
This weekend was the process of me trying to track my tilted video, which was interesting to figure out. I have tracked before, but I learned it in a slightly different way, but I tried several different way to get the least amount of error.


May 14, 2019- May 15,2019
This is when I mainly started to create my 3D scene in Maya, I imported my camera in from Nuke. Then I had modeled my first version of my box which ended up not matching at all, but it did help me set up my scene a bit. Honestly, it was just over the next couple of days that I struggle to make the box match up because of its particular sides. I recreate the box and the box projection several times to get it right.
Here are some of my renders from my first box


I also had to learn how to import animation in to my scene without the whole rig, just to make it simple. So we learned how to export a alembic from the animation then imported that file into our scene. Below is them roughly composited into my box


May 18,2019 - May 20,2019
When we took the video I also took a reference of the box open, which has helped me a lot in cleaning up the back ground plate to comp my projected box in. I had to transform that frame over so that it was matching with the brush then I gave it the same track in my video so that it would stay where I needed. I also used a transformed still of my video with some of the comp.


I now have kinda gotten the outside box the best I can and did a rough comp of the new box with my cleaned backplate.


May 22, 2019
I have color corrected my back plate to make it more interesting and the shadows more intense, which helped a lot with creating fake shadows for my scene. I went back through my scene in Maya and switched out the photos to the color correct box. Below is a before and after the color correction.


May 23,2019
I was hurriedly adding more render layers I thought I needed, and shading the inside of the box to slightly match the reference of the inside of the box. Then I was comping them in to see the whole effect.


May 25, 2019 - May 26, 2019
I had to fix a bunch of stuff with the inside of my box and it is still not completely done. And sometime over the weekend my videos were on adding up right so I had to fix all of that, and I am not really happy with how the project ended and will try to fix the numerous errors within the scene as much as I can, probably after the quarter ends. I want this to be a good project.
I also created a closer camera to the animation without the track just so you can see the animation more clearly. And here are the end results of that.