MS10 - Final Touches

March 4 - 5

Shot 02

I have been working on finishing Shot 01, it is the first the shot that has been done rendering. We re-rendered Mason’s pyro to put because he increased the density so you are able to see more of the bellowing motion that he had. I also am using a gizmo called Flare Super Star to make the car light flare on top of the Expo Glow. From the last render I changed the angle of the flare to match more with reference of the lights.

The flare doesn’t stay on the truck so I had to track the motion of the truck on this shot. Besides that I have also color corrected around the lights so that it seems like more light is coming in the pyro using a roto on the pyro beauty.

Without the Colorcorrect

With Colorcorrect

I have also been trying to figure out a way to fix the back ground to match the other shots like the mentors suggested. I used a hueshift on the blue but it made it a weird color that didn’t match that well. Now I am going to try and replace that area with a area from shot 02. The only thing I am worried about is it being very obvious that it is from that shot which would make it confusing because we are viewing the truck in different angles.

Below is a first iteration of a new background that was taken some from the second shot. Because adjusting the color of the original background was ending up very odd looking.

OLD

NEW

March 6

Today we finished all of our renders so I was organizing them and then working on shot 01 again. I adjusted the background a bit and also the flares. Then I added motion blur to the bag when they fall and also the truck when it bounces.

LIGHTS W/O PYRO

ROTO FOR COLORCORRECT

PYRO WITH CC

I am pretty happy with how it it turning out, the only thing now that I want to fix is the blue edges that are being made by the chromatic aberration node because it looks off on top of the cream background.

I have also started to fix shot 02, and at the moment to be able to have the depth as like the background plate as possible I am using three different zdefocus nodes, which is starting to look more like the result I want. I have also been adjusting how when the objects got out of focus they were starting to make this bokeh effect but now I have changed that with a filter on the defocus node. I am still trying to get it to look correct, but this is a start.

BEFORE

AFTER

March 7 - 8

Shot 01

With shot 01 after yesterday I just did a couple of adjusting tweaks and then after I rendered it Kiersten suggested to remove the chromatic aberration off of the truck or add it to the background because it wasn’t really blending that well. Then Bridget also reminded me that our DOP was also off in this shot. With I forgot to adjust and now it looks way more cohesive with the other two and looks more micro now. 

Here is my script for shot 01

Shot 02

I had a bunch of work to do for this shot. I repainted the clean plate as well as colorcorrected it a lot to get it more alike the original. If I had more time I would edit this more because the transition of this plate showing over the original is still a bit rough because I wasn’t able to get the lines to look exactly the same. I also adjusted many of the aovs because the original render was a bit bright from the ground bounce.

 And then also with the pyro, each shots pyro has the same shader but in this shot it seems to just get too green, so I tried to turn it down a lot for my first. Then I darkened it even more because Bridget suggested that it seemed like the bokeh looked like it was on top of the pyro instead of the other way around. Below is the pyro after I darken it a bit more and fixed the reflection a bit.

Getting the shadows and the ground to look nice was one of the hardest things with this shot and I still want to work on it because I think it has a lot of potential. I’m still not fully satisfied with how the shadows and the reflection look. I’ve changed it so many times but I’m not completely sure where the disconnect is. One of the issues I feel like is what I mentioned before about the cleanplate looking a bit off. Even now the colors don’t seem to completely match. 

For the headlights in this shot I also used ExpoGlow and tracked the lights layer to use the Flare gizmo on the lights. These were harder because I had less light to work with so there is less detail. I’m still pretty satisfied with the look but the back lights look very dull still. 

shot02_lights.png
expoglow_shot2.png

The DOP was very difficult with this shot and I had to make several layers to get it somewhat looking correct to the plate. See more from the days before.

Below is the main script for shot 02.

Shot 03

With the lights I did the same method as the other shots and I like how they ended up for this shot especially at the end of the shot.

The pyro was a bit difficult with this shot because it seemed so much darker the last shot so I was trying to make them match more. And we also had some rendering issues which I tried to fix a bit. So at the end the pyro didn’t have enough frames so I had to freeze frame the front pyro then slowly make it dissolve to the end.

Below are some frames of shot 03.

With this shot I thought everything would go smoothly putting it together but then I realized that the beauty layer was rendered without the Z channel. At this point it was way too late to start a new render because the farm was so backed up and our renders took awhile. I ended up using the zchannel from a past render and merged it into our new render. This would be one of the reasons why it looks weird. Then after that I had to use many blur nodes and rotos to try and mimic the DOP. It ended up looking okay but the way it is interacting with the money is a bit odd so I would go back and work on that or just rerender the beauty correctly. Below shows my script for the depth and also the really messed up alpha I had to make for for this shot.

THE ALPHA OF THE DEPTH

Below is the main script for shot 03.

Overview:

There is a bunch of things that I would fix with this project, but looking back at the renders now I think they ended up nice for the time we had and the challenges my team faces. I really enjoyed creating it and I know my group got a bit irritated with all of our hold ups, but I really like the look of our out come. If I get time to work on anything soon I would work on the integration of shot 02 more because it just isn’t looking as nice as I would like. I am hoping to ask the mentors what edits I should make to make this a demo reel piece. Overall, I am really glad to have has this experience and I am glad to have such a hard working team!

MS9 - Compositing Updates

Last Week Updates

I was gone most of last week, so I wasn’t able to do as much as I wanted in the composting. Things I was able to do was fix the HDR for shot one so we didn’t get the weird scratch on the side of the truck, worked on the clean plate more, and worked on the edge of the reflection and shadow to get it more like the reference of the cube/ grey sphere.

This week I am going to push the compositing even more because I noticed that in parts the truck did not seem completely connected to the ground and there was a gap between the truck and the shadow. I have a lot to work on this week, with all the notes the mentors gave us and also the notes I made myself last update for each shot. Updates will come soon.

Feb 26

I have finally been able to use the reflection mask for a mask in the clean plate without the blue light because it doesn’t have the pyro in the mask so I can get a solid line in the blue to reflection like in the reference. In the first photo, where there is a edge of the outline of the truck into the blue highlight. So it will only be visible in those few frames that the truck passes through the highlight.

I was able to use the clean plate that I painted over the blue highlight and the reflection mask (which mask out the area that will be showing the reflection of the truck) to merge it on top of the original plate. Now the issue is to get the reflection inside of the mask to show in a accurate way, getting the small part that is the reflection and shadow a bit darker then the other part of the shadow, and getting the shadow to lay on top of the blue like the reference.

On the left is the first version of everything together. The things I still want to work on is the reflection and how prominent it is because in the reference you can see it pretty well, but when I do that it creates a white out line of the reflection. Like in the version on the right.

Feb 28

I have been able to fix the glow around the refection, so it is not as odd looking . And I have also added another mask and grade to make the shadow that is in the blue reflection more saturated like in the reference. The only things not completely matching would be the shadows and I am not completely sure they are looking as good as they could. Of course I am being a bit thrown off because the lighting is a bit different in the reference then in our render.

We have have it render with the depth to see if that will make out depth of field any better then in past renders, so Kiersten is working on that. Then after they are rendered I am pretty sure I am still going to have to put the zdefoucus on top of it to get it looking integrated with our background because of how shallow the DOP is.

Feb 29

I have been working on shot 01 because we have been able to fully render it today. The rendered refocus is looking nice but it did bump up our render time a bunch.

I am waiting to fully render this shot out of nuke until I a can color match it with the other two because we had critique about this shot being much darker then the other two.

MS7 - Compositing Updates

February 14

I painted our HDR because the blue rim light was just too intense on the car and in our end renders it looked more like the light was coming from the bokeh in our plates because you don’t see the other light. So we decided to paint out the blue light and just add a blue rim in our 3d scene. So it will match up more with the plate and not blow out the truck.

February 15

Since we are painting out the HDR, I decided that just using the painted plate and and screening over our artificial rim light was the less efficient way to do it. So instead I am using the render layer that we have for the cover of the rim light as a mask to put the painted plate on top of the original plate. This way we still get the look of the original highlight that was on the plate. And I am able to get that little piece where the blue rim and the shadow over lap darker then the main shadow. It makes it match the original reference of the cube and grey sphere.

February 16

We have been rendering out the layers of shot 02, and I have just been putting together the new layers I have into my nuke script and going over all my connections to make sure they are all right and just color correcting somethings. Because I recreated my script the other day with putting in the rim light mask. The renders are taking pretty long because of the pyro, so it is something to remember in the future for our final renders. Will put visual updates as soon as possible.

February 17-18

Shot 01

Changes made:

  • Graded the backplate to make it match others more.

  • Adjusted the zdepth so that it was more intense so you focus more on the corner where the light is.

  • I used chromatic aberration to make the top left corner blend into the background lights.

  • Used expo glow on the new Headlight render layer to create a more realistic looking backlight.

  • current render layers used: truck beauty (with money bags), headlight beauty, pyro beauty

Adjustment to be made:

  • The zdepth is creating a haze around the money bags while they are falling.

  • There is a reflection on the truck that looks like a scratch, so figure out where that is coming from.

  • From this shot to the last one, it seems a lot brighter, but I like the color of this one.

  • There is some specular noise on both the truck and the moneybags that needs to be fixed.

  • The moneybag shader still looks odd in this shot. I was going to fix it, but we wanted to wait until we saw it with the shadows turned on.

Shot 02

Changes made:

  • Made the z depth more intense, especially when it is in the back corner.

  • Used expo glow on the new headlight layer.

  • Worked on getting the pass through of the blue rim light, I am now just using the plate that I painted the blue light out of as a mask with our blue rim render layer.

  • Used expo glow on the new Headlight render layer to create a more realistic looking headlight.

  • Tried to make the truck go back out of focus when exiting the frame.

  • Fixed the painted plate because there was still remanence of the blue highlight.

  • current render layers used: truck beauty (with money bags, money, and dice), headlight beauty, pyro beauty, shadow matte, occlusion, reflection, rim light mask

Adjustment to be made:

  • Keep working on the blue rim pass through. Looking at the reference it is more of a hard line then a blurry line like in the render; ours is really hazy right now because of the new position of the light and it cast this huge shadow which makes the car cover up the blue light earlier then I would think.

  • The back shadow is also more effected by the blue light. Right now it is a bit messed up because of the rim mask because the pyro is in that mask when it isn’t suppose to be.

  • The reflection for under the car gets a bit lost in this shot and needs to be more intense like in the reference.

  • When adjusting the DOP in this shot when the truck goes out of frame it becomes a bit crunchy looking, so I need to look into that.

  • The front wheels look disconnected to the ground.

  • The moneybag shader still looks odd in this shot, especially at the end.

  • Fix the bottom of the painted plate because the transition between the two is too noticable right now.

  • The rearlights look a bit dull.

  • Fixing the DOP when the truck goes off screen.

Shot 03

Changes made:

  • Color corrected the backplate to make it match others more. It was still too saturated and green.

  • Adjusted the zdepth so that it was more intense so you focus more on the corner where the light is.

  • Used expo glow on the new Headlight render layer to create a more realistic looking backlight.

  • Cropped in this shot so that the truck would take up more of the frame.

  • current render layers used: truck beauty, headlight beauty, and the old shadow matte, occlusion, and reflection

Adjustment to be made:

  • In the forground the zdepth was making the front left wheel disappear if I set it up higher for when the truck in in the background, so I am also using a blur with a roto in the back. So I need to look back into that.

  • The shadow and occlusion are really off for this shot. We thought they could work, but it was too late when we realized that they would not so I had to transform them.

  • The shadow is also really light in this scene and I need to look back at the reference again.

  • Same about the reflections they also need to be worked on.

Questions:

What would be the best way to create the blue reflection in the shadow that is behind the truck, like in the cube reference for shot 02?

Suggestions about the DOP, like with shot 02 and how it should go back out of focus, but the wheel gets crunchy.

If the lights have changed in our scene (with the rim light) should I still try to get it to match the reference we have?

MS6 - Compositing Updates

February 6

From the review with The Mill they suggested for consistency of the plates that our first plate should have a higher depth of field and larger bokeh. First, I painted over the old plate then I used rotoPaint to create different color circles that would represent the bokeh.

At first I tried to just use different blurs to create the effect but it wasn’t exactly looking right. Then I tried to create spheres in maya and turned on the z channel thinking it would give a sightly different effect.

Below are my beginning attempts.

I honestly wasn’t getting any good results on what I was doing so then doing more research into creating bokeh and there was a gizmo someone had made for nuke, and Sarah from the Area 51 team added it to our nuke pipeline she developed for our studio class so I could use it.

After using the gizmo plus the direct blur, and I remade the circles in a larger size and different colors. I was finally able to create a more realistic bokeh, matching more with the references of the other two shots.

To the right is the node tree for the new shot 01, the bokeh blur gizmo helped make the noise on the inner part of the bokeh, and it also made it easier to mix it with different colors like how it is in other shots. It also made the inner part of the bokeh lighter in the center. Below is the final out come of the new plate for shot 01.

February 7

With the feedback from the mentors Kiersten recreated the grey sphere and the lighting so we can get it correct in the second shot. Because where the highlight on the board has been the most difficult part to pull off.

The rest of the week have been trying to set up the for sure layers we need for the renders. The main one that was edited was the reflection one. The idea now is to use the reflection pass and have another shadow pass that would be the cut out of the object blocking the light from the blue light. Then we have created another reflection pass to without the blue light rim light to lightly put back into the area that the object shadow into the blue light.

February 8

We decided the best way to create the same effect as the sphere example for shot 02 would be to paint out the current highlight because there is not a way to effectively because the plate was so blown out in that highlighted area. Below is the painted plate without the highlight.

February 10

The last couple of days was just trying to troubleshoot the renders because with Houdini Arnold the render farm won’t let us render out all of our render layers together if the ROPs are connected. So for the renders we have for this week we had to watch the farm very closely and render our each of the render layers individually which was a hassle with the slow network. We eventually got the main render layers that we needed for each of the shots, but we still need to edit each of them and make a more efficient way to create the renders. After getting these new renders I want to take the time after the mentors comments and try to edit my nuke script so in the next upcoming renders it will be easier to update the files. One of the things that was difficult was that after creating the grey sphere test render, I thought that I could just exchange the render layers with the truck but how the truck passes over the blue highlight it made it look odd. So, I am still trying to work the layers for shot 02. Below are the build-ups of shots 02 and 03. I don’t have shot 01 on here right now because it is unnecessary to have as many different layers.

SHOT 02

SHOT 03

What’s Next:

For me, I need to refine the render layers for each shot, adjust so shaders of the assets after seeing them rendered out, edit nuke scripts, and start rendering the updates for the shots as soon as possible to do more troubleshooting.

MS5 - Scaling, Look Development, and Render Passes

Scale Testing

January 28

During our meeting with the mentors they suggested creating different sizes of the truck with motion blur and depth of field. I did a quick render of the test before our group meeting so we could all decide what size is best for our project.

motionBlur_settings.png

I test of the depth of field is very rough, because of the rig I was not able to move or alter the truck without ruining the truck or the animation which would ruin the motion blur. To the right is my settings for the motion blur, and I am trying to figure out the best way to set it up for shot 2 . Because we are thinking of making it a slow motion shot so trying yo figure out what the motion blur looks for that.

So to compensate for not being able to change the truck model, I just adjusted the camera with out changing the angle of it. But, with changing the camera is going to effect the z-depth aov that is rendered out of Maya. So all the test are very rough with the inaccurate camera set up. But, after figuring that out Mason was able to adjust the scale in his original scene to match version 2 of our sizes of the truck. So now we have a accurate scale of truck, rig, and layout to hand off to the animator.

All Assets Look Developed and Textured

January 29

Today’s goal was to finish all of the assets look development and have them ready for critique early so there is time to fix them before we start a majority of our render passes this weekend. The one shader that has changed the most is the dice shader, which has now been turned red to pop out of the background more.

Red Plastic - Dice

Hypershade

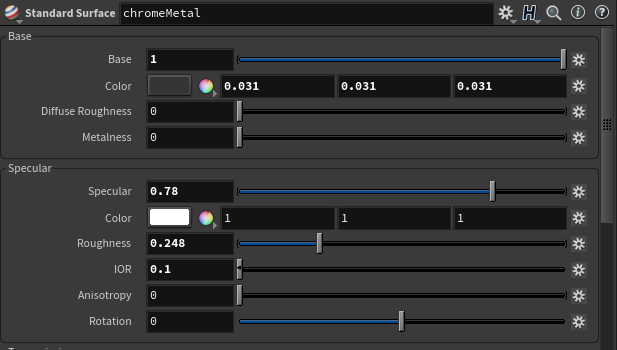
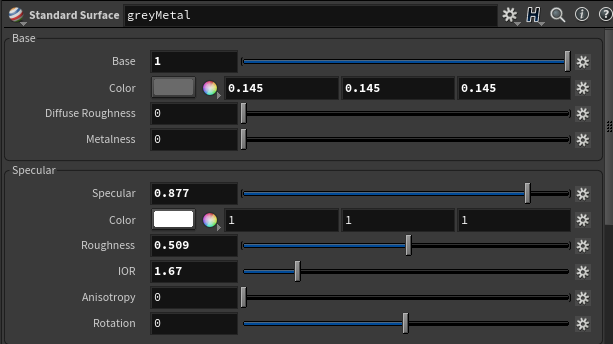
Chrome - Duck and Hat Monopoly Pieces

These have mostly stayed that same from the last update just some individual edits.

Burlap - Money Bag
This shader was a bit difficult, I kept going back and forth with creating a map for the texture or creating a procedural texture. In the end procedural was the best way especially for the geometry in the beginning of our shot 1. I don’t want a map I made to be warped or distorted by the vellum effect. The only thing I don’t like about it at the moment is how receptive and a bit unnatural it comes off as. I also was having some issues with getting rid of the ring render artifacts, and I am going to ask one of my team mates if they know how to fix this on Houdini.

Red Plastic - Monopoly Hotel Piece

The only thing I edited on this shader is the subsurface colors, because on the green shader I added some blue undertones to make it pop. So, on this shader I added purple to make it more dynamic as a shader.

Green Plastic - Monopoly House Piece

Colorful Paper - Monopoly Money

All of the paper has the same settings the only changes are the color maps and subsurface colors.

Various Metals - Kentucky Ave Sign

All of the shaders are the same since last update on these, but I final got the sign itself to render. I realized I was plugging in the material nodes to the wrong place with the geometry. I am still using the same alpha map from before, but it actually works.

Smoke Comp Tests

January 31

Today I started testing with the smoke render that Sumedh handed off to me. The smoke is not with our animation we are going to have so the trail is not correct, but it was just for starting to test the set up and to get the smoke looking correctly integrated. These test do not have any reflection apart of it yet.

Looking at reference of burnout on trucks the smoke barely creates much of a shadow which is my issue with the first test.

Reference

Test 1

Test 2

Node Tree

WIP Compositing of Renders

February 1

Today we started getting our renders done and putting the scenes together. All of our shots got roughly comped together, and we still have some settings we need to figure out. On all of our renders we do not have motionblur yet because of the time constraints from having to locally render. We had the motionvector aov but when implemented I got a unrealistic blur on the entire car. I will continue to work on that. We also do not have the other assets in the renders because we wanted to focus on the truck, but for the next update they will be integrated as well with textures.

Another, technical issue I had was adding so many zdefocus nodes in my script, because I wasn’t sure where or how the correct what to comp together our rendered assets then zdefocus all of them in one node because I have the shadow, occlusion, etc directly effecting the backplate with the shadow plate before connecting the beauty render of the truck. I will look into this more, I am probably just overlooking the obvious.

Shot 0010

With shot 01 it is the easiest to set up, but I am worried about making it flow with the others because it is at a high angle. We also decided that we are going to re-time the pyro and the moneybags because they get lost in the pyro.* We also have the textures for the moneybag it just wasn’t implicated for our render. We are also still working on the shaders for the pyro in this shot.

*see Mason’s Blog for more information about moneybags: https://www.masonbrahney.com/post/sdgm-560-monopoly-car-commercial 

Shot 0020

With shot 02 at the moment we are rendering the effects and the car separately only because of time constraints, but next week everything is going to be rendered out together so the truck will correctly interact with the pyro. Right now there is not reflection or intersection with the tires and the pyro, so in the comp I tried to layer them with the volume direct and indirect aov, but it could only do so much. So for next week I’m expecting a better integrated scene for this shot.*

We also are adjusting the light that is creating the blue highlight so that it matches up more with the highlight on the board. We saw that it was a bit too off after seeing all of the layers together in comp.**

Also since we were rendering them separately there was a lot of overlap with the shadow and occlusion layers which I think made it a bit to dark at times, but I am hoping to resolve that with our next renders.

In out video we also slowed down the speed of the footage a bit to get the reference of us wanting to do slowmotion for a part of that shot. As of now it is a bit choppy because we need to export our animation at a different frame rate and we also thing in our final renders of the pyro/dice and truck that they were rendered out at different frame rates. To adjust that for this first pass we just added time offset for now.

*see Sumedh’s Blog for more information about pyro: https://sumedhk.com/sdgm-blog

**see Kiersten’s Blog for more information about lighting: https://www.kierstenyahn.com/themill 

Shot 0030

With shot 03 a bit of a size issue with the animation but we were able to adjust it in Houdini, and I also adjusted the scale a bit more in Nuke because shot 02 and shot 03 were not matching up scale wise. Our plan is to fix that as soon as possible. The only thing that the scale effects with the final comp is at the final frames the truck wheels are getting bounce from the red spots for the board, so when it is scaled up it looks incorrect.

Overall, shot 03 went the smoothest to comp together because it doesn’t have any of the effects incorporated yet with our render. The animation ends a bit abrupt right now, but it is currently being finished. Also seeing all of the plates side by side I think I need to color correct this one bit bit more to get it less saturated and to match shot 02 more.

MS4 -Look Development and Tests

Asset Shaders

For this week since our time was more limited I wanted to get the look development for the assets completely done including the textures. I was able to get the shaders pretty upgraded since last week, which has been a bit of a challenge navigating arnold in houdini because many nodes are not named the same thing. Here is the the updated video of the shader balls.

I’m pretty satisfied with how they look on the shader balls, but what I started to have issues with adding the texture maps to the shader. This mostly took place with my “Kentucky Ave” sign asset because I have a black and white map (seen on the right) that was suppose to be connected to my mix shader so that the white metal could be shown with the red. I tried to trouble shoot this a couple of times, but ultimately it just wouldn’t render anymore. I am going to recreate my hypershade network in Maya to see if I get the result I want and to see if I am plugging everything in correctly.

Test Look Development on Assets

From the assets I have I made test renders on the actual models. These are all WIP in the time of the picture and I plan on resolving all my issues by Tuesday this week. I am probably going to change the color of dice to a red plastic to make it pop off the board some more suggested by Sumedh.

Here is the maps I used on the assets seen above. I have only tried to put a little bit of detail since with our scale of the scene most of the smaller assets will be barely in frame. The other assets that will need texturing is the money bags and the money. I am currently waiting for the money bags for when Mason is satisfied with his soft constraint sim that he is developing for the money bags. With the money am going to scan our monopoly money to create the texture and color or the money.

Shader Attributes

Other Updates

I have set the cameras in the Maya scene we have, but after exporting the cameras to Houdini, and Kiersten lighting our Shot 2 we think it that it Houdini is not reading our cameras correctly. So I have redone the layout in Houdini to see if that helps with the lighting. Then we are going to set up our render layers and start test composting. I really want to work on the blend of the shadow, reflection, and the glare for the comp as soon as possible this week. We will also get our animation locked this week, so we will have better previs of the FX simulations as well. And, hopefully by next update have a bunch of test comps.

MS3 - Development of Idea and Look Development

Re-shooting Plates

After getting the feedback from everyone, we decided to re-shoot our plates to get a really nice look to our commercial. We had to shoot our plates twice over the weekend because our first iteration shot 01 was way too underexposed compared to shot 02 and 03. Then we also thought that we could push the look of shot 02 even more because we were worried that it was once again looking really flat, and compared to the other two it was not as effective. We also tried our best to achieve those ‘hero’ angles seen in truck commercials, and we go it to as close as we could in the conditions we had.

While shooting the plates we kept having issues when because we were shooting something so small of dof was over powering the whole plate. We also tried to shoot outside, but decided that inside was better after talking to Bridget, and she said a more controlled lighting environment was more ideal. I also noticed in some of our earlier shots, our ‘static’ cameras were shaky because we were in a space unable to fit a tripod, so in our final shots we made sure to make a ‘tripod’ to ensure we didn’t have excessively shaky footage.

Also if the plates look a bit off from one another, I am still working on color correcting them to make them more cohesive. All of the plates are also static now so I don’t have to worry a lot about a perfect track and just work on comping the assets in seamlessly.

This is the previous version of shot 2 that we took on the first day, and we are keeping it just incase we get feedback that the dof in our current shot 2 is too excessive. But, we thought looking at it in between the first and second that it was not as strong, especially since we got referred to go for more “hero” angles for our truck and to look up commercial reference shots.

Commercial Shot Reference

We referred to the video on the left for both shot 01 (0:13) and shot 3 (0:23). The video on the right we used for reference for shot 02 (0:01) and also drift reference. For shot 02 we were also wondering if the possibility of us doing a slow-motion shot was a good idea or even possible with the footage that we have.

Below the images are the reference images from the videos compared to a rough draft of our assets in the scene to give a better understanding of what we plan to do.

Re-shooting Plates Continued..

This time around in our shoots we made sure to get a shadow plate, along with a plate with a grey ball to better visualize the lighting, and a cube to be able to set up the scene (as seen in the rough layout images above). We also created a HDR using a 360 camera and a look develop rig using the HDR.*

*see Kiersten’s Blog for more information about HDR: https://www.kierstenyahn.com/themill 

Asset Models

Also since the last meeting we have created or found all of our assets that we want to incorporate in our commercial, minus the money bags because Mason is trying to find the best why to have them for the vellum effect he is creating*. We have also UVed them so they are ready for texturing after we get our shaders correct. Mason modeled the hat and duck monopoly pieces; he is also working on the money bags. I modeled the sign and monopoly houses.

*see Mason’s Blog for more information: https://www.masonbrahney.com/post/sdgm-560-monopoly-car-commercial 

Look Development of Assets

We have also started the look development of our assets. The images below is the first iteration of the asset shaders minus the truck.* I will probably have to rework them a bit because we were having HDR issues so the colors maybe off. Sumedh has also started look development for the pyro burnout effect he has created.** The images of assets below the video are in the order of reference for each shader ball in the video. The

Shader Attributes

*see Kiersten’s Blog for more information about truck shader: https://www.kierstenyahn.com/themill 

**see Sumedh’s Blog for more information about Pyro Lookdev: https://sumedhk.com/sdgm-blog 

Other Updates

  • Mason has made a rig for our truck and several simulations for effects that we have with vellum and particles.

  • Sumedh has made amazing burnout render with pyro.

  • Kiersten made our whole look development scene and has really nice start on the truck shaders.

MS2 - Concept and Idea

As a group we decided on our truck commercial being on a Monopoly board. The idea is a truck drives around a monopoly board, knocking over pieces, avoiding die, and kicking up money. I will be CG integration developed in Houdini (besides modeling) and rendered with Arnold. Mason created a mockup of the concept.

conceptArt01.jpg
conceptArt02.jpg

The truck we are using is a 2018 Ford F150 Raptor in the color ruby red to contrast the board.

Other assets we decided on are:

  • Dice

  • Money Bags

  • Monopoly Money

  • Monopoly Houses

  • Street Sign (Kentucky Ave)

  • Monopoly Metal Playing Pieces

Shot List

Shot 01

Truck starts on ‘GO’ on Monopoly Board, dice rolling behind the truck.

Camera: High Angle Close-up

Shot 02

Truck drifts around the corner, knocking over houses and other playing pieces.

Camera: Aerial View Shot

Shot 03

Truck comes to a halt in the ‘Free Parking’ space on the board. This is the beauty shot of the sequence.

Camera: Medium Shot

FX Ideas

Shot 1 - Bags of money fall into back of truck (vellum), money is being blown out of the bags using particles, and truck starts to speed forward creating a burnout effect (pyro).

Shot 2(Optional) - wide shot of truck moving across the board while two dice falling in the back and chipping(RBD).

Shot 3 - Truck makes a hard turn creating a intense burnout and dust kickup (pyro), and while truck is turning it runs into several Monopoly houses kicking them out of the way (RBD).

Shot 4 - Truck comes to an abrupt stop, front tires have a burnout and dust with pyro.

Reference for FX

Burnout Reference Videos

https://youtu.be/_bWUO1xmC2k

https://youtu.be/q5VqDhbE5gI

https://youtu.be/JVmKrfxa9bk

Bags Falling into Truck

https://youtu.be/IocCC1-jeTY

https://youtu.be/D8s-bjAJtwI

https://youtu.be/xJD5XVja09k (0:34)

Money Flying (Particles)

https://www.istockphoto.com/video/bills-blast-gm146426165-2771624

Dice (RBD)

https://www.shutterstock.com/video/clip-1024293815-slow-motion-two-red-dice-craps-thrown

-other reference can be found in our progress video for this week-

Style Reference

Filming Rough Plates

On Saturday morning, Jan 11, we took some rough plates at Mason’s house to see what angles would be best, and how the DOF would look. Our focal length stayed pretty constantly around 30 - 45. The drop-off in most of our plates are pretty shallow, which we are worried will give our truck too much of a toy car look. But we also want DOF because we want most of the focus on the truck. We also took some moving plates, so I could do some tracking. So far I like shot 1 as a moving camera and shot 2 and 3 are static. We were having difficulty getting the static cameras because we had to film hand held and with how our camera was angled we couldn’t use the tripod. I am currently trying to stabilize the plates, any suggestions would be helpful. The only shot we are all completely agreeing on is the final shot, because we all think that it should finish like a classic car commercial and be a static cam for the beauty shot of the truck.

After we got the shots I did a slap comp of our truck on the board, to see what size we would like. I also did some test tracking on shot 1. I also made a previs video of how we were thinking the truck would drive on the board, which can be seen in our weekly video.

Previs Stills

Tasks and Schedule